Basic Usage
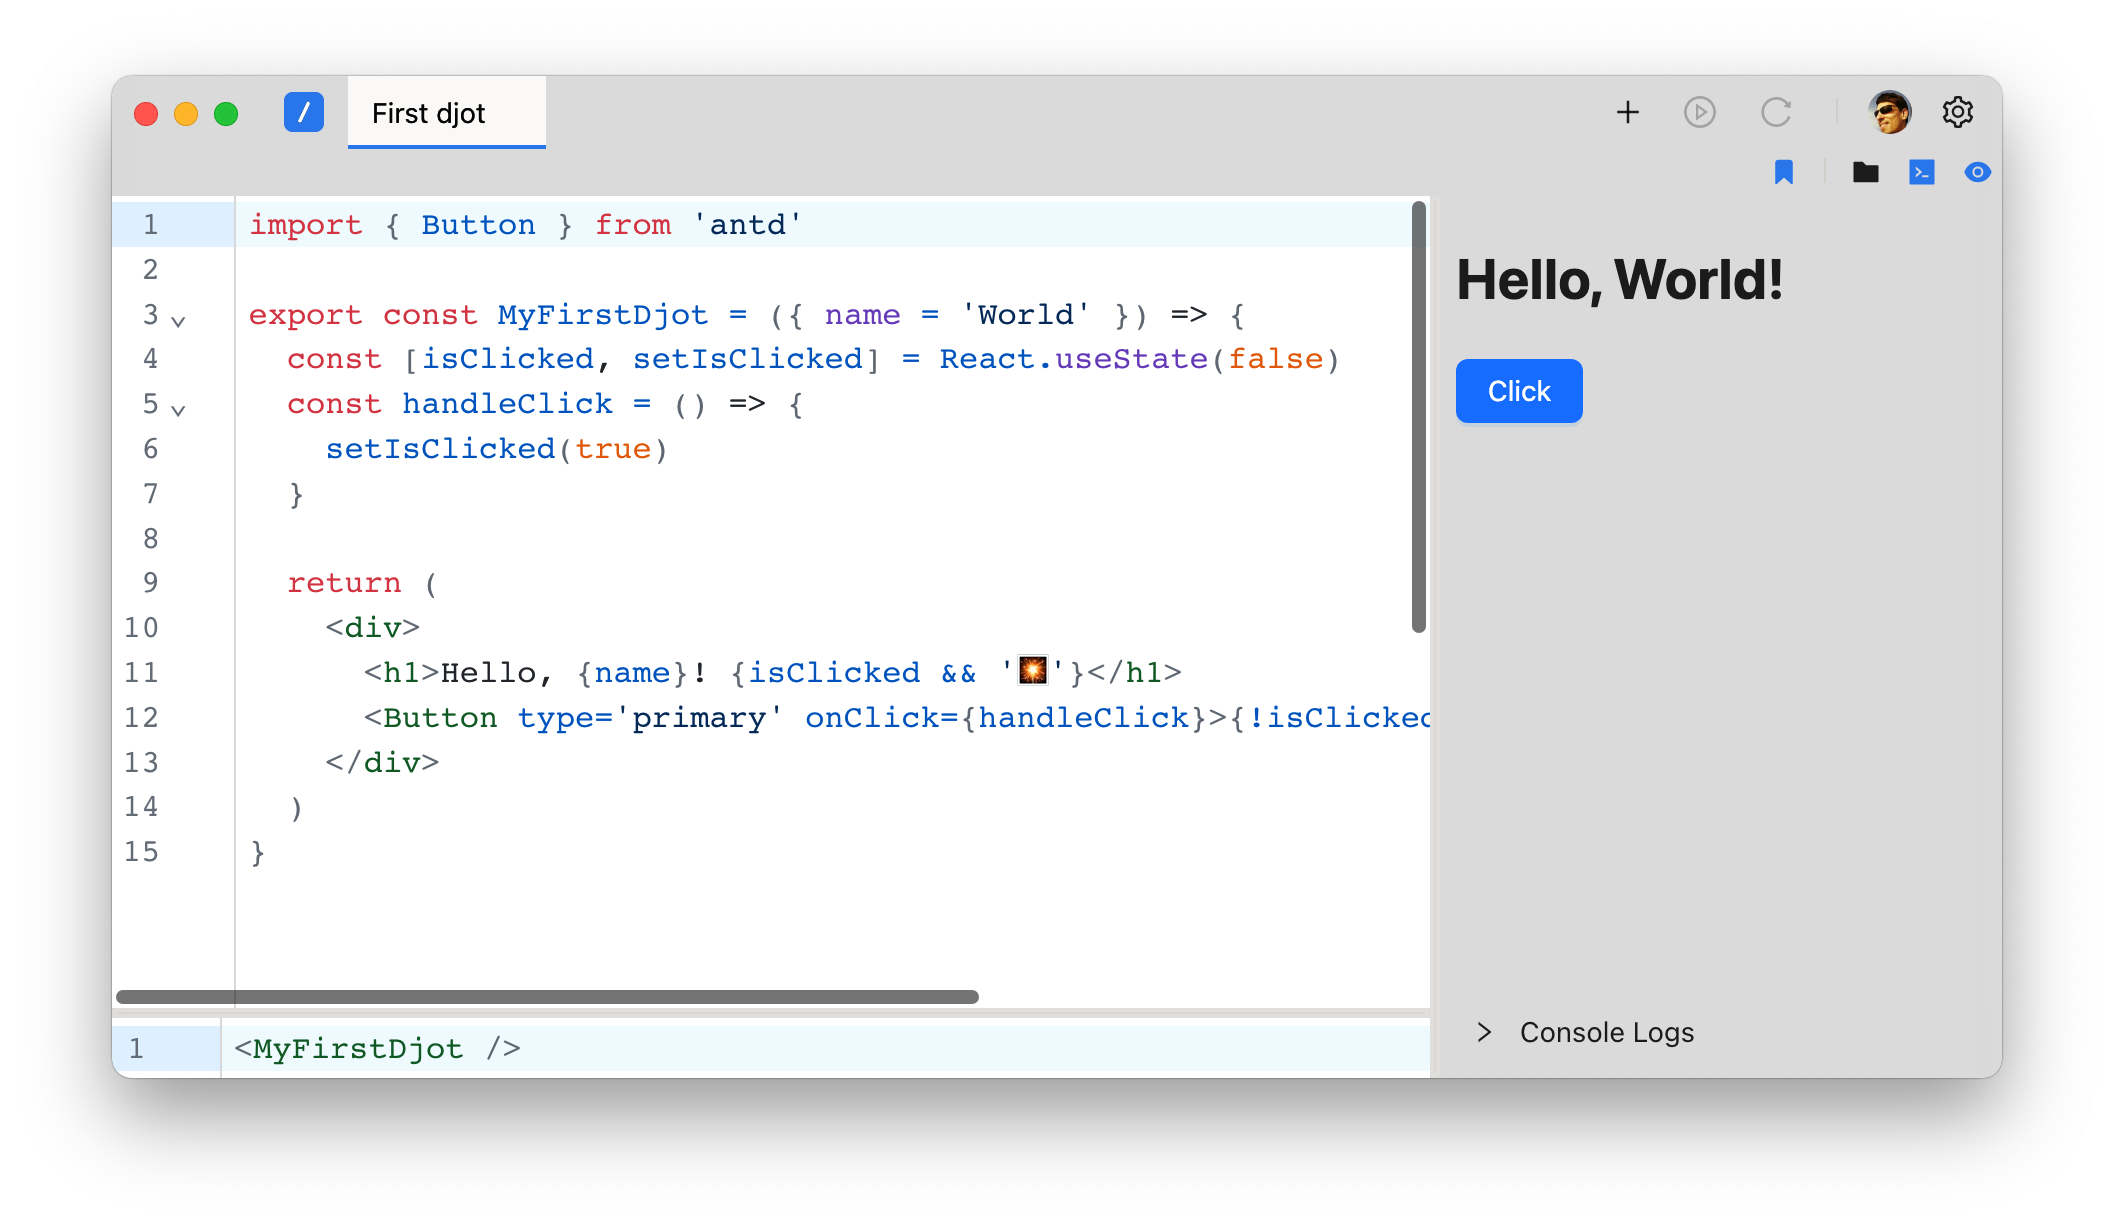
After installing Djot and running it for the first time, you should see the following screen:

Anatomy of the Djot window
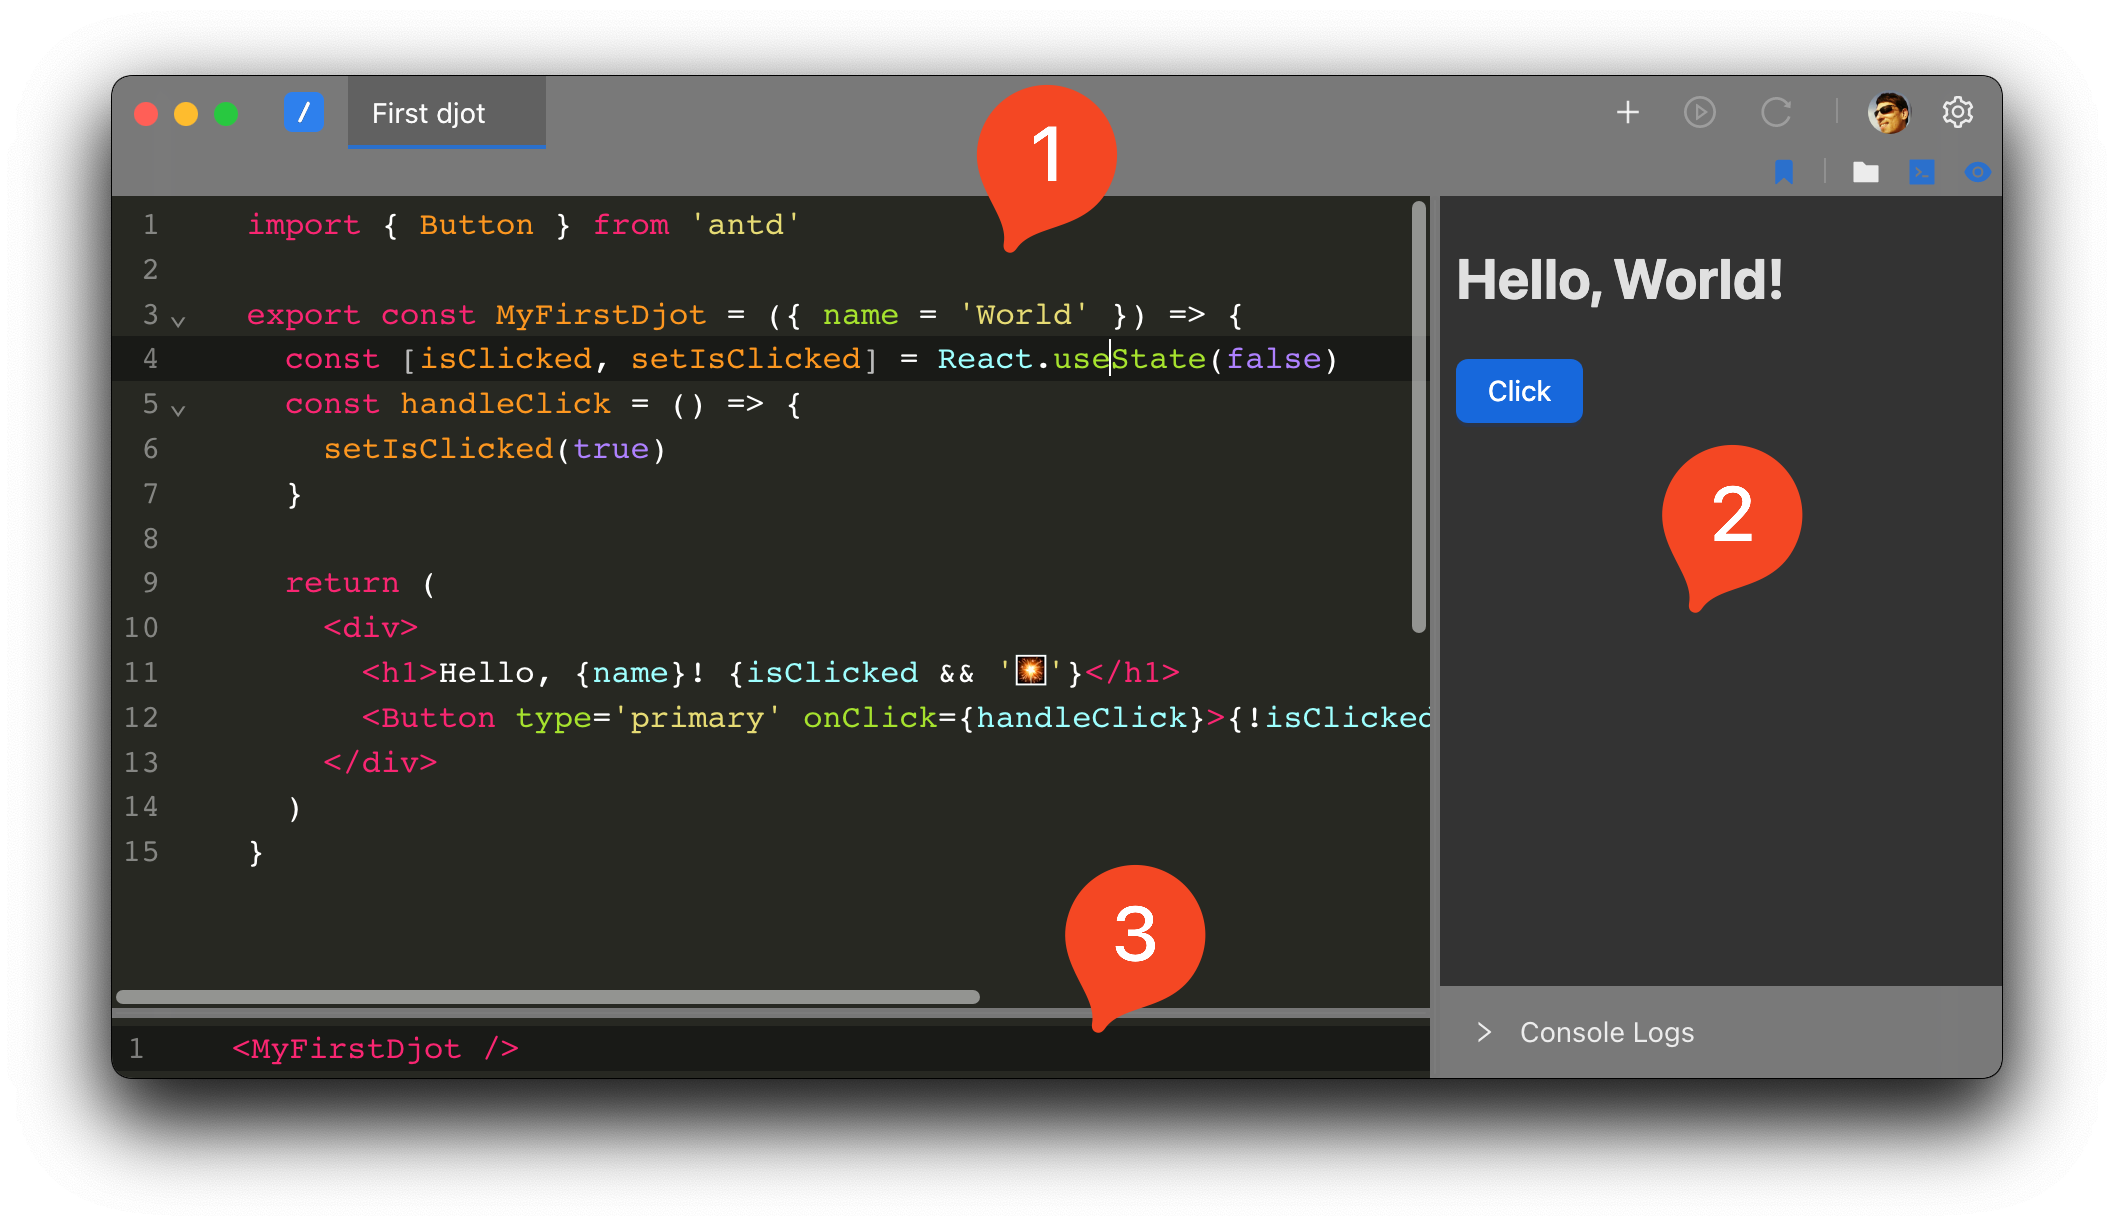
The Djot window is divided into 3 main sections:

1. Main Code
This is where you write your code.
This is your "standard" code - you'll write here the code of your application.
For the most part this code shouldn't be aware or tied to the Djot platform/environment.
2. Demo Display
This is where the output of your code is displayed.
This will mostly update automatically as-you-type and will display any errors that might occur - hopefully with enough information to let you know what went wrong.
Additionally at the bottom of the Demo Display you'll find a basic Console Logs display. It's not very advanced at the moment, but it should be enough for most use cases.
It's highly recommended to use the built-in dev tools console by pressing Cmd + Option + I (or Ctrl + Shift + I on Windows).
3. Demo Code
This is where you write the code that will be displayed in the Demo Display.
This is basically a return value of your code and has access to the exported variables from your code.
You can provide most common types of values here - strings, numbers, arrays, objects, etc, along with React components or HTML elements, all of which should render directly to the Demo Display section.
User Interface

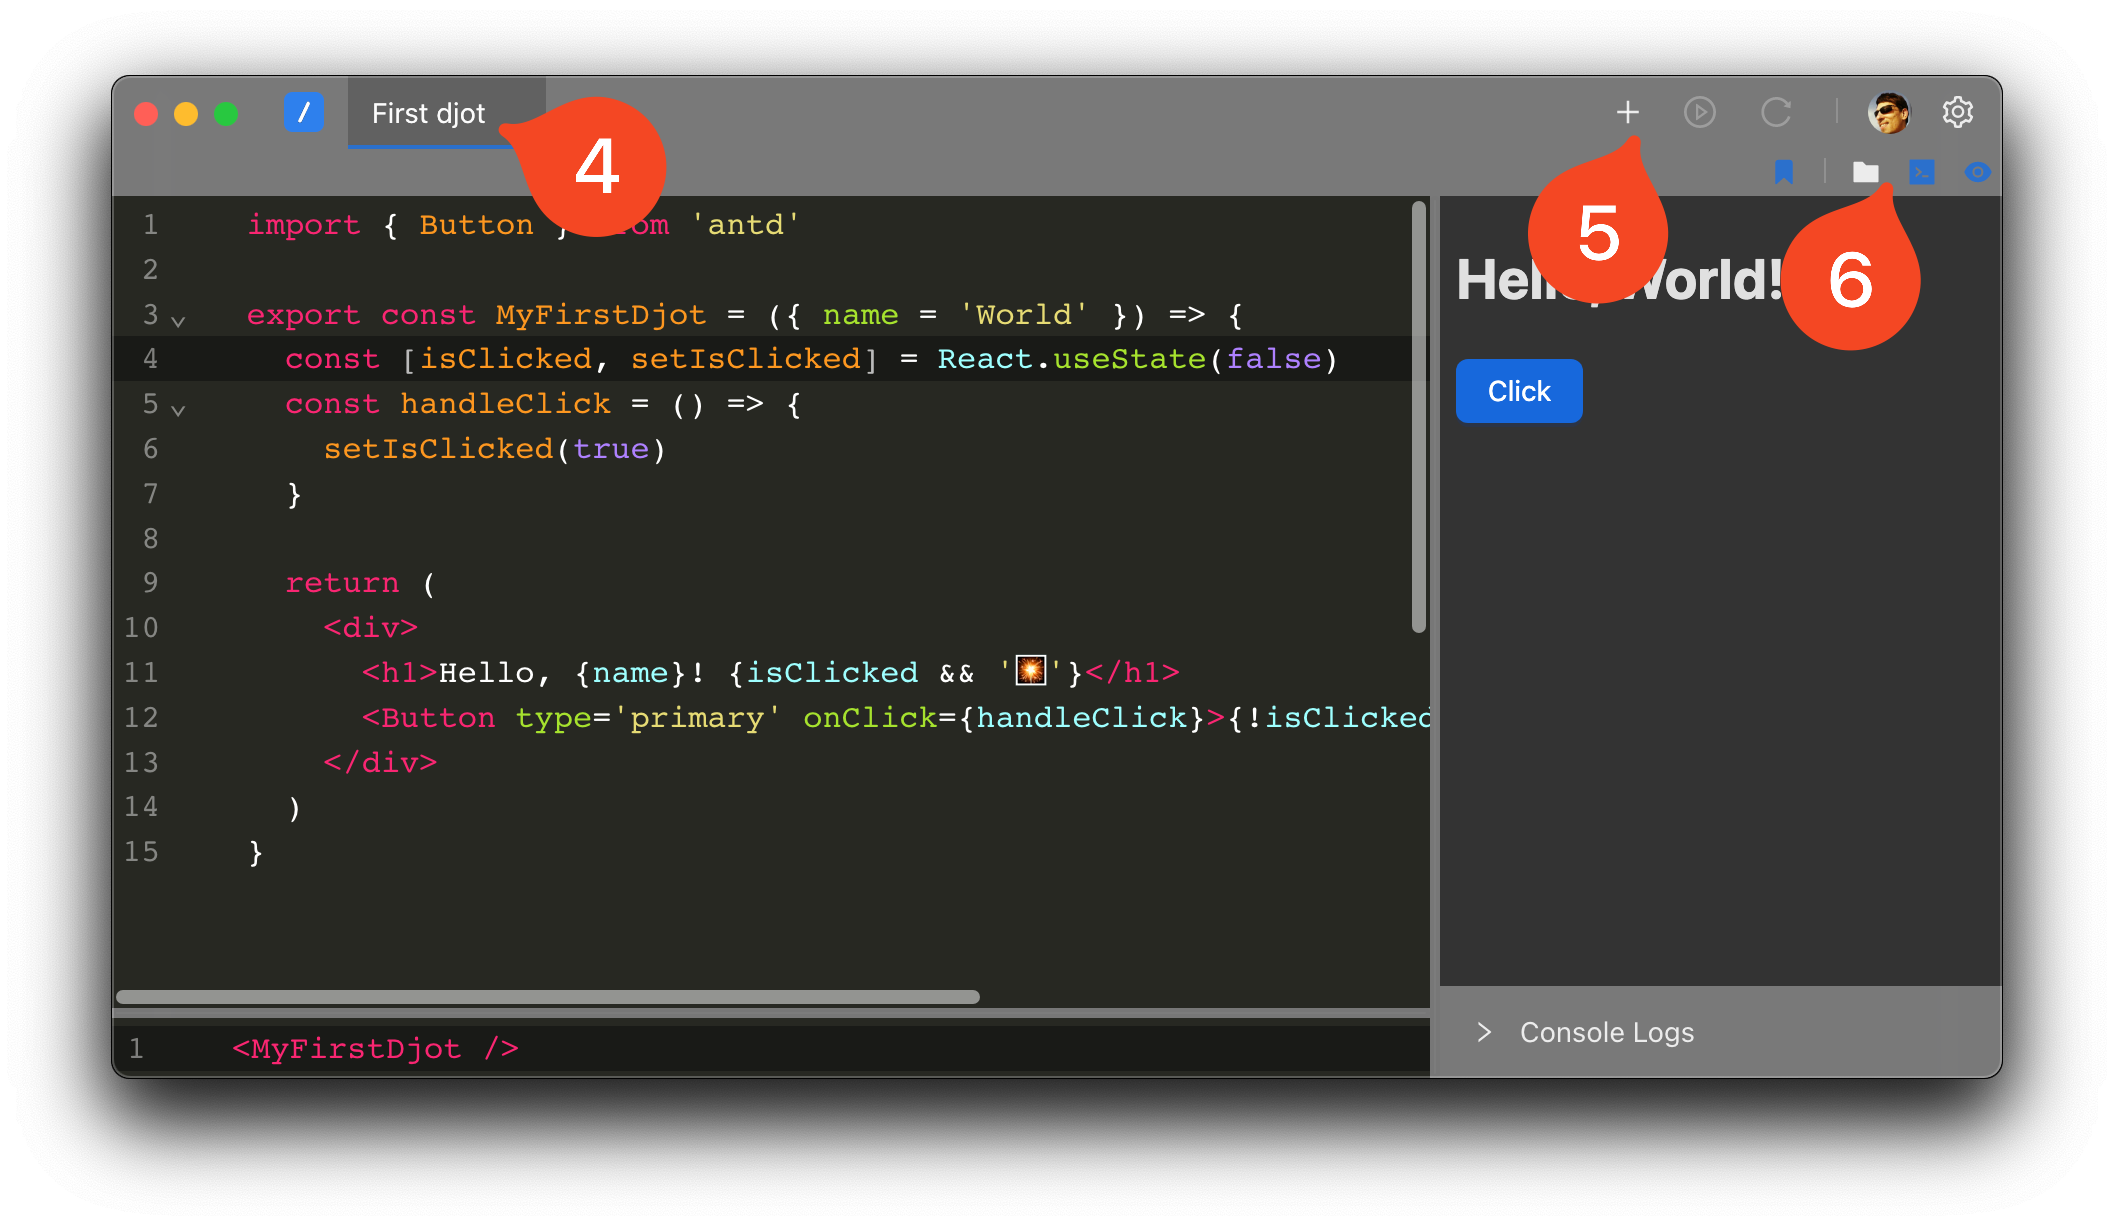
4. Open Djots
This is a tab bar that displays all the Djots you have open. You can switch between the open Djots by clicking on the respective tab.
5. Djot Actions
This is a set of buttons that allow you to perform actions on the current Djot, and create a new Djot using the ➕ button.
New Djot Tab
This button will create a new Djot tab.
Play Djot
This button will open a new window with the latest saved djot version and will run it.
Note
Unlike the Demo Display section in the main Djot window, the Demo Display in the Play Djot window will not update automatically as you type, and will only update when you save the Djot.
Reload Djot
One of the built-in features of Djot is that it will save your Djot automatically as you type. This button will reload the Djot from the latest saved version in case you need to revert to a previous version.
6. Djot Options
This is a set of buttons that allow you to change the current Djot options such as hiding and showing the demo display, or changing what the demo display shows.
Auto Compile

Djot by default will automatically compile and your code as you type. By toggling this button you can disable this feature and only compile your code when you click the Run button which will be visible on the left side of the Djot window or by pressing the hotkey Cmd + Enter or Ctrl + Enter.
File/Global Demo Preview
Toggling this button will change the demo display to show the current Djot's demo code, or the global demo code.
When active the djot will render File Demo Preview, e.g. each open file will have its own demo preview.
When inactive the djot will render Global Demo Preview, e.g. all open files will share the same demo preview, the index.tsx file.
Show/Hide File Tree
Toggling this button will show or hide the file tree.
Show/Hide Demo Code
Toggling this button will show or hide the demo code.
Show/Hide Demo Display
Toggling this button will show or hide the demo display.
Additionally a fly-out menu will appear with the option to dock the demo display to the left or right side of the Djot window, or at the bottom.